Hooray for Friday! I’m super happy it’s Friday because 1) Warren County is out of school today which means I didn’t have to get up early today to go to my practicum and I’m hoping to get some grad school assignments done today during my time off, and 2) Michael comes home today! He’s been out of town for work since Sunday night. You know how hard it is for me when he’s away, although did pretty good by myself this time by staying really busy to keep my mind of being scared – Sunday night I made one quilt block, Monday night I made another quilt block, Tuesday night I thoroughly cleaned the house (and believe me, it needed it!), Wednesday night I went to church and then baked my cake and made icing for my cake decorating class, and Thursday night I went to my cake decorating class. I also got caught up on a bunch of non-scary shows (gotta save the CSI, Criminal Minds, and Law & Order for when I’m not alone!) – Smash is my new fave! Have you watched it yet?
Enough about that! On to the cakes.
After last week’s class we were given homework to bake a cake, either two round cakes or one deep round cake that we would cut into layers, chose of make some sort of filling, and make a double batch of icing.
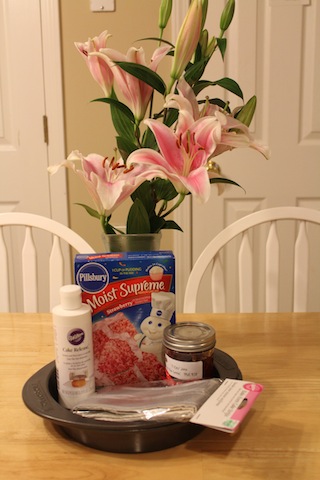
 I chose a strawberry cake with homemade strawberry jam/jelly/preserves (not sure which) as filling (thanks Sabrina and Anna!)
See those flowers? Michael had them waiting for me when I got home from taking the PRAXIS last Saturday – isn’t he the sweetest?
Anyway, I want to tell you about some of the other things in the picture that you may not know about and share some tips/tricks I’ve learned from my class so far:
- The white bottle is called Cake Release. It’s a Wilton product (Wilton does our cake decorating classes) that you can buy and Hobby Lobby, Walmart, JoAnn’s, Michael’s, etc. You brush it on your pan with brush and it does the same thing as spraying/greasing/flouring your pan. I loved it! My cakes always stick to the pan, but this time my cakes didn’t stick at all!
- The things in the bag are Wilton Bake Even Strips. There are two strips of some special cloth that you get wet and wrap around the cake pan(s). They are supposed to keep your cakes from getting the humps in the middle that often happen and keep the edges from getting harder than the middle. Again, my cakes are always humpy in the middle and this time my cakes were super flat and the edges were perfect!
(I promise I’m not trying to sell you a bunch of Wilton product, they don’t even know who I am, they just worked really well for me and I wanted to pass that information on)
- Another trick that our teacher taught us was to always add one extra egg and 1/2 extra cup of oil to any boxed cake mix (in addition to what it calls for). She said that it will make the cake so much more moist. So for my cake I used four eggs (the three it called for plus one more), 1/3 cup oil (that it called for) plus 1/2 cup oil (that she recommended) and the water that the box said (I think it was a cup). I don’t have the exact same cake made using only the recommended ingredients to compare to, but the one I made was super moist so I’ll definitely be trying this again.
- She also recommends to set your oven to 325 (if it says to set to 350) and then bake 5 extra minutes.
- Also, only mix the cake mix long enough to get everything incorporated (don’t mix it the full 2 minutes or whatever it says to do) – this keeps it from getting air bubbles.
- All these tips and tricks are from my teacher – I’ve only used them once (although they seemed to work for me)
Wow I’m wordy today!
So I made my cakes and they turned out great. I made my icing, which was a huge mess, and I wasn’t thrilled with it (meaning I didn’t want to just sit there and eat it off a spoon…which is probably for the best) but it’s kind of growing on me. It’s not my favorite, so I may play around with some other recipes rather than just using the Wilton one, but it’s fine for now.
Some people had made one, deep cake and had to cut it in half, others had humps on their cake and had to level them off, so we leveled our cakes off first (mine were flat enough that I didn’t have to do anything to them, which was a little sad since I had bought a nifty new tool to use to level the cakes.
 then we used our icing to build a dam around the first layer and filled it with our filling
 then we set the second layer on top – I’ve never made a layer cake before so I was already so proud of myself even before I started the decorating!
then we iced our cakes – the top was easy but the sides were hard!
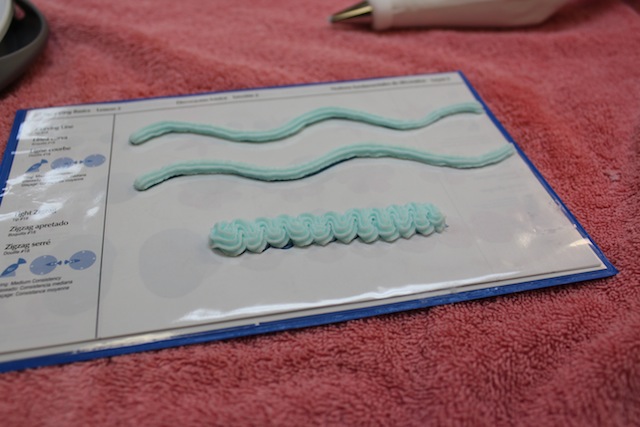
 while our iced cakes “set up” (the icing had to harden enough to decorate on) we learned how to use some different tips to make various shapes/designs.
Once our icing was hardened enough we using piping gel and wax paper to make a transfer of a picture of a cupcake and put it on our actual cake (I forgot to take pictures, but it was really cool how it worked!). The we decorated it!
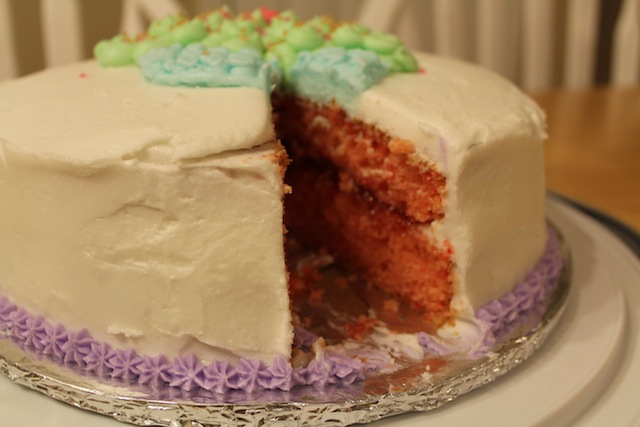
 Here’s my cake! It’s not perfect, but I think it’s pretty good for a first try,
 and here are some variations from other people in my class (after I look at theirs I realize I should have done icing around the top edge as well as the bottom edge, but I forgot about that part until I’d already put up all my icing…oops)
 when I got home I couldn’t wait
 to eat it to cut in to it to see the pretty layers
Next week we’re learning how to fill cupcakes and make flowers out of icing. I can’t wait!
(P.S. Don’t forget to sign up for the Surrendered Marriage prayer challenge)


Love these they are so cute! Great job, stop by and say hi :)
Super impressed with this! You’re so talented. Thanks for taking the time to walk us through it and show all the pics! :)
Nice job!
great job! love the cupcake topper!
Cute! The inside of your cake looks really yummy. Another great tip for “doctoring” a cake mix is to use milk instead of water. That helps reduce the crumbs. I love the endless variations on cake mixes!
I LOVE your tips! Featuring you again! Great job!
Melody
One Chatty Chic
Hi! I had my first class in Course 1 tonight and I actually read your blog a couple of weeks ago before going so I would have some idea of what to expect. I was a little disappointed because my teacher was not nearly as thorough as yours seemed to have been. She doesn’t really seem to be following the lesson plan so I’m just hoping it gets better in next week’s class.
I have a quick question for you about the baking tips your teacher gave you… You said ”She also recommends to set your oven to 325 (if it says to set to 25)” but did you mean to write ”if it says to set to 50”…? I’m just a little confused about that, could you help me out??? :)
Thanks!!!
I’m so excited that you’re taking the cake decorating class but I hope it gets better for you! You are right – it should say 350, not 25. I have no idea what I was thinking! Thanks for catching my error (and I hate that I didn’t find it sooner!). Yes, if the instructions say to bake at 350, you should actually bake at 325 for 5 minutes longer.
I hope you have fun! Please let me know if you have any more questions